 Quick Start Guide
This section is a quick jumpstart on how to get things working. More detailed information is included in other sections of this site. First time set up and operation of Silent Sifter is only 5 steps:
 Step 1: Add Inputs
The first step is to tell Silent Sifter where the files are that you want organized. You will add each of them as 'Input Locations'.
The inputs are located at the top, green area of the home and configure screen:
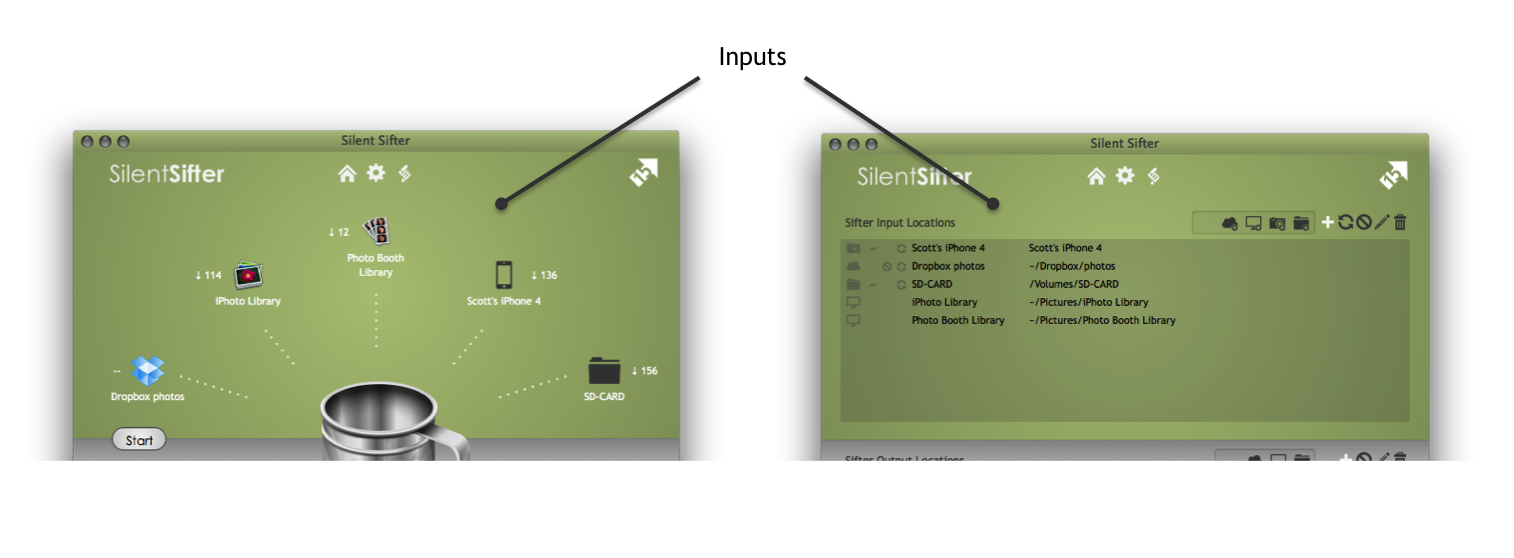
Determine where the files are that you want to organize, and then add the appropriate folder, iPhoto, PhotoBooth, or camera inputs.
Learn more about Input Locations.
 Step 2: Add Outputs
The second step is to tell Silent Sifter where to deposit your organized files.
You will add each of them as 'Output Locations'.
The outputs are located at the bottom, white area of the home and configure screens:
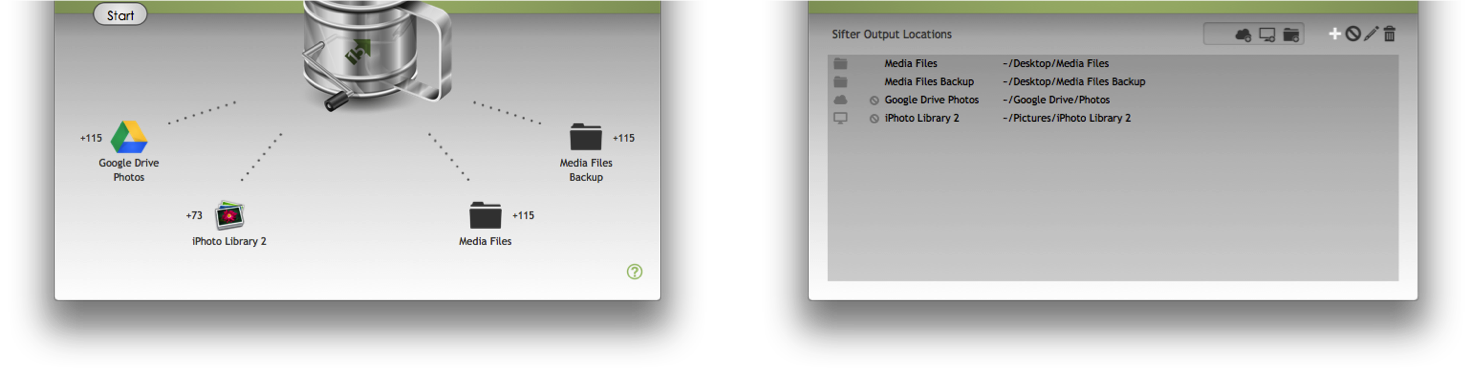
Determine where you would like your files to be output, and then add the appropriate folder, or iPhoto outputs.
Learn more about Output Locations.
 Step 3: Customize (optional)
You can optionally customize the configuration for what folder structure, file renaming rules, or filters you would like to apply to each input/output.
If you choose to skip customization, Silent Sifter will use a default organization structure. The default structure follows this convention:
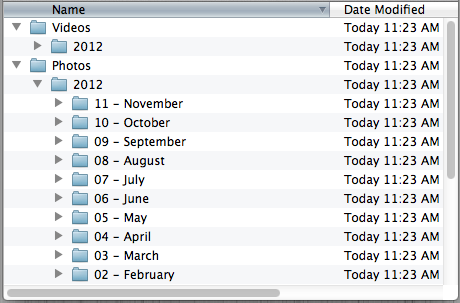
Folder Structure:
- By file type (Photo or Video)
- Then by Year
- Then by Month
File Renaming:
- Add the timestamp of when the file was original created as a prefix to the filename
If you want to customize, there are a plethora of possibilities. Learn more about Customizing Input/Output behavior.
 Step 4: Sift
The next step is to tell Silent Sifter to process all of the inputs and organized them into your outputs.
- Go to the Silent Sifter Home screen
- Press the 'Start' button
- Files will be pulled from the input locations, processed, deduplicated, filtered, renamed, and copied into the output locations you specified. By default, the original files remain intact in the input folders (unless you have explicitly told Silent Sifter to take action on the inputs).
For more information, learn more about Using the Home Screen.
 Step 5: View History (optional)
Once sifting is complete, you can see a detailed log of what Silent Sifter did with your files during the sifting process, and why. For example:
- Why was a specific file deemed a duplicate? Where is the duplicate?
- When two files have a filename collision, where are the two files and how was it handled?
For more information, take a look at using the home screen, using the history screen, and viewing sift history.
Help, I'm Stuck!
If you've ready through all of the above and still are having no luck, check out the rest of the knowledge base, and if you are still stuck then contact us.