There are two ways to add these types of inputs: drag and drop, and with the configure screen.
Drag and Drop
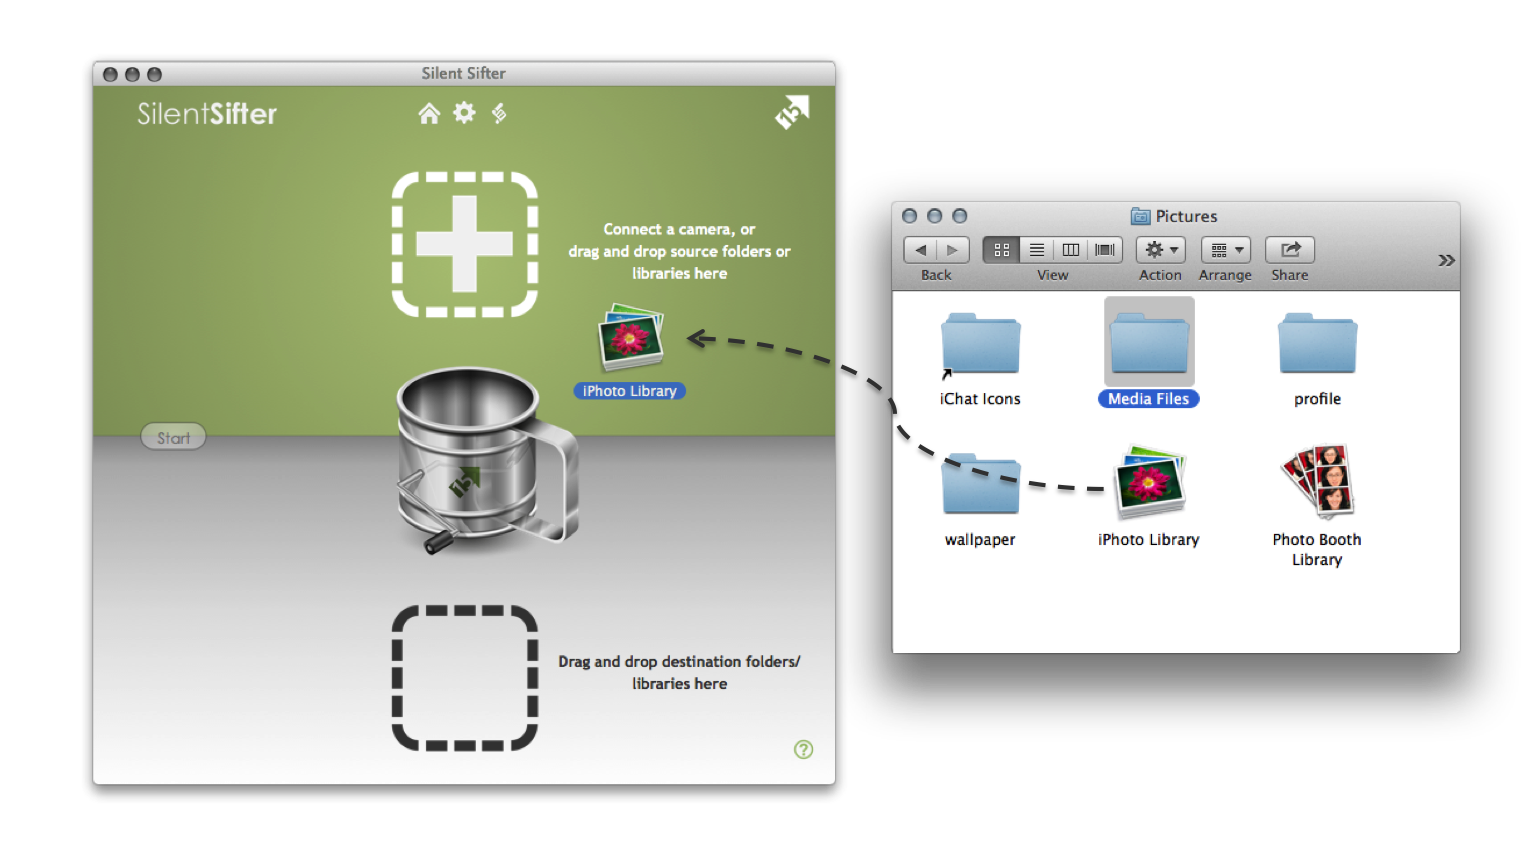
- Open a Finder window
- Locate the folder or Library file that contains the photos/videos you want Silent Sifter to organize.
-
- iPhoto Library: a single file that contains all your iPhoto data, typically it is located in your Pictures folder, and is typically named ‘iPhoto Library’
- Photo Booth Library: a single file that contains all your Photo Booth data, typically it is located in your Pictures folder, and is typically named ‘Photo Booth Library’
- Folder (standard, gDrive, or Dropbox): a single folder that contains the photos/videos you want to organize
-
- Select the folder or Library file in the Finder window, and drag it from the Finder window into the Silent Sifter window
- Drop the folder or Library file in the ‘input’ area (top green half of the Home screen) in Silent Sifter.
Configure Screen
- Open Silent Sifter
- Change to the Configure screen, by pressing the ‘gear’ button at the top of the screen
- Show the add inputs button tray, by pressing the ‘plus’ button above the list of inputs
- Press the appropriate button for the type of input you want to add
- Folder: folders
- Applications: iPhoto, PhotoBooth
- Cloud: Dropbox, GoogleDrive
- Choose the folders, libraries, or devices you would like to add, and press ‘Choose’You can repeat this process for any folder, iPhoto Library, or PhotoBooth Library, to get all of your photos/videos into Silent Sifter.
Note that you can add multiple folders or libraries at once by selecting more than one and pressing ‘Choose’.